Install "Plug-in Spy" in your Eclipse Neon IDE
16 September 2016
There is a lot of documentation about the Eclipse "Plug-in Spy" feature (Plug-in Spy for UI parts or Eclipse 3.5 - Plug-in Spy and menus). Im my opinion one information is missing: what you need to install to use the Spy feature in your Eclipse Neon IDE. Here is my small how-to.
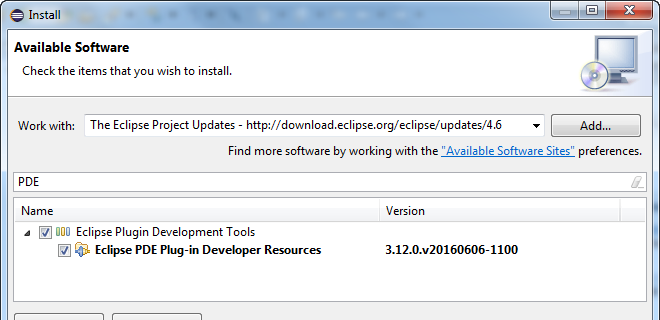
Select "Install new Software…" in the "Help" Menu. In the dialog, switch to the "The Eclipse Project Updates" update site (or enter its location http://download.eclipse.org/eclipse/updates/4.6). Filter with "PDE" and select the "Eclipse PDE Plug-in Developer Resources". Validate your choices with "Next" and "Finish", Eclipse will install the feature and ask for a Restart.
Figure 1. Install new Software in Eclipse
If you prefer the Oomph way, you can paste the snippet contained in Listing 1 in your installation.setup file (Open it with the Menu: ).
<?xml version="1.0" encoding="UTF-8"?>
<setup.p2:P2Task
    xmi:version="2.0"
    xmlns:xmi="http://www.omg.org/XMI"
    xmlns:setup.p2="http://www.eclipse.org/oomph/setup/p2/1.0">
  <requirement
      name="org.eclipse.pde.source.feature.group"/>
  <repository
      url="http://download.eclipse.org/eclipse/updates/4.6"/>
</setup.p2:P2Task>
Your Oomph Editor should looks like in Figure 2. Save the file and select "Perform Setup Task…" (in the menu). Oomph will update your installation and will ask for a restart.
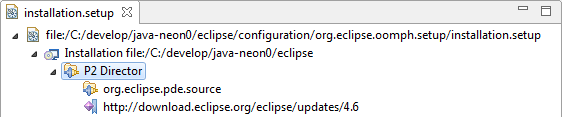
Figure 2. Oomph setup Editor: installation.setup File
In both cases, after the restart you can press alt+shift+f1 and use the Plug-in Spy as in Figure 3.
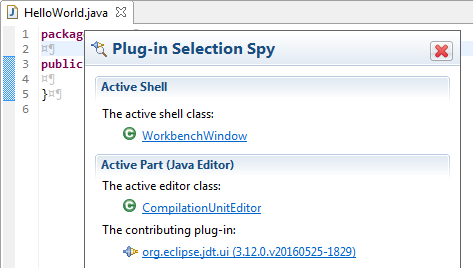
Figure 3. Plug-in Spy in Eclipse Neon
Post source on GitHub